

The female hairline varies in so many ways that makes it attractive and distinctive: a widow’s peak, a cowlick, growth at different angles, varying amounts of temporal peaks, and varying height above the glabella. These features were described in detail by Dr. Bernard Nusbaum in a recent Forum article.1 However, some ladies are born with a hairline that is higher than they like for aesthetic purposes and management. More than about 6.5cm above the glabella gives the impression of a receding hairline and makes them look older than their years and more masculine. It gives them a large forehead and compels them to grooming forward to hide it. However, the hair behind this high hairline grows out at a more vertical angle and makes forward grooming difficult. It is not surprising, therefore, that some ladies look for ways to lower the hairline to a more average position.
Traditionally, this has been handled by placing hair transplants in front of the high hairline. The results have improved as follicular unit transplants have enabled a more natural appearance. However, there are always concerns about adequate growth, natural alignment, and density. Often, it will take a number of sittings to produce an acceptable outcome.
The alternative to transplants is to lower the existing hairline en masse by the hairline lowering procedure described here. It was first popularized by Dr. Sheldon Kabaker,2 but a decreasing number of hair surgeons are familiar with it possibly due to the success of follicular unit transplants and the move to minimal surgery. This procedure takes advantage of the natural hair distribution and density behind the hairline and the scalp’s mobility to simply move it forward. In 2 hours, the hair-bearing scalp is placed, on average, 2cm lower than it was before. While at first glance it can appear to be beyond what an average hair transplant surgeon can manage, our many years of experience in moving scalp around during the scalp reduction and flap eras tell us that it can be done safely and successfully with some preparation.
Following is a general description that serves as an introduction to the procedure. A complete set of pictures with descriptions and a video explaining all aspects from start to finish are available at www.ndsphotosandvideos.com.
With this procedure, usually one advancement procedure is enough. If needed, a second advancement can be done a few months later when the scalp is loose again, or a small sitting of follicular unit transplants can be used to round out the hairline in the temples. Either way, it is completed more quickly than with transplants alone. In addition, the hair behind the lowered hairline is original in growth and density. Massaging the scalp in a backward-forward movement for a month before the surgery can improve the forward advancement achieved. Numbness of the advanced scalp is temporary and handled well by the patients as long as they are forewarned. This loss of feeling in the front third of the scalp is inevitable because the sensory nerves are cut by the hairline incision.
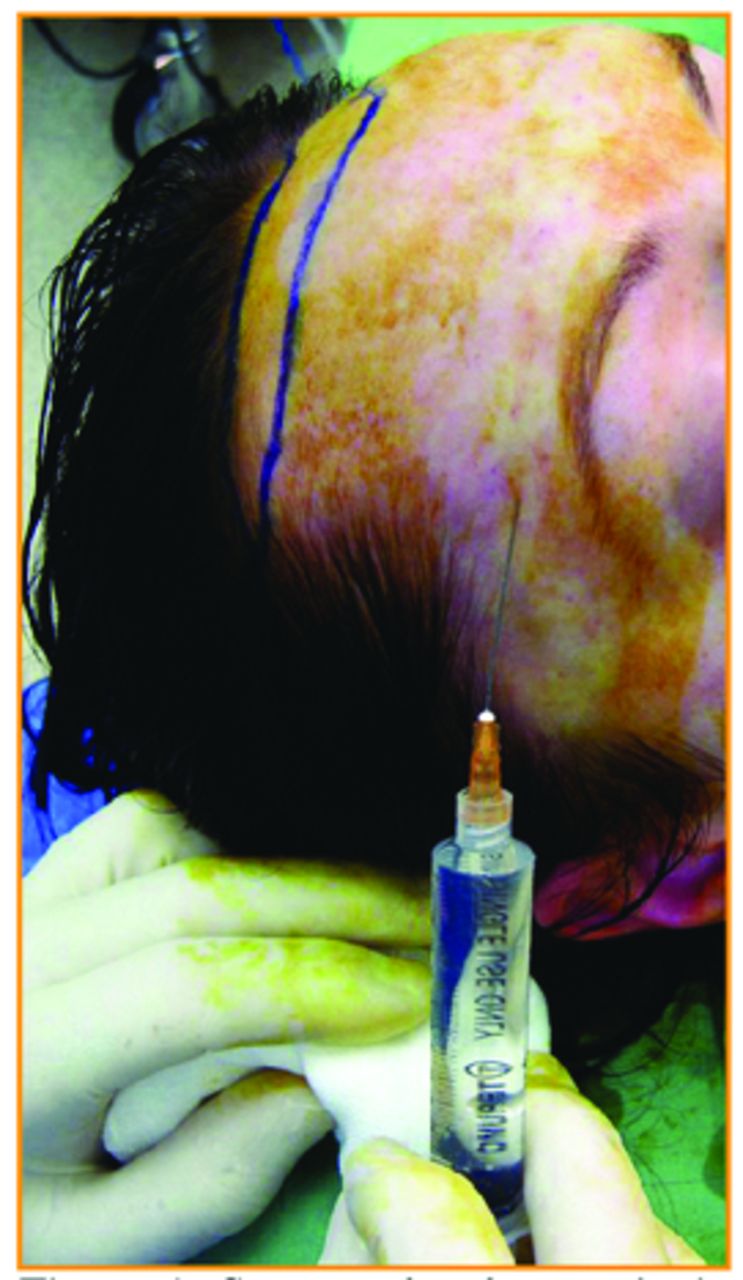
The patient needs to be comfortable with adequate sedation and pain relief. Pre-medication with a strong analgesic, such as paracetamol with codeine, and a sedative, such as temazepam, will calm the patient. Further sedation in the operating room depends on the doctor’s facility and experience. Without it, the next step needs to proceed more slowly as the local anaesthetic is more painful if injected quickly. A ring block of local anaesthetic with epinephrine is administered just above the eyebrows, around the sides just above the ears and around to the back (Figure 1). The link above will give details of technique and the strength and volume to use. However, you can expect that all of the scalp above the ring block will be numb and vasoconstricted.

Stronger local anaesthetic just above the eyebrows.
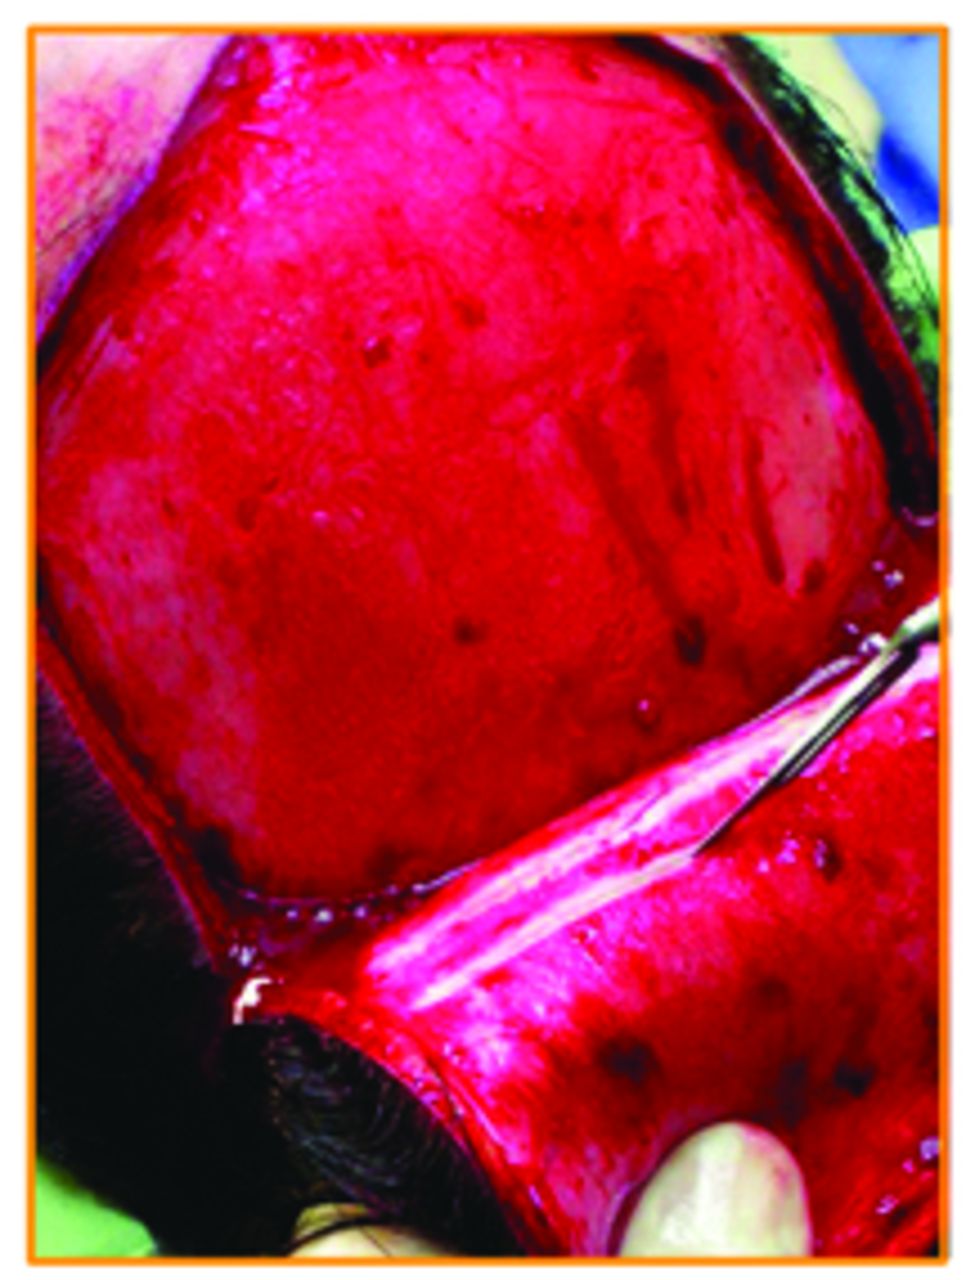
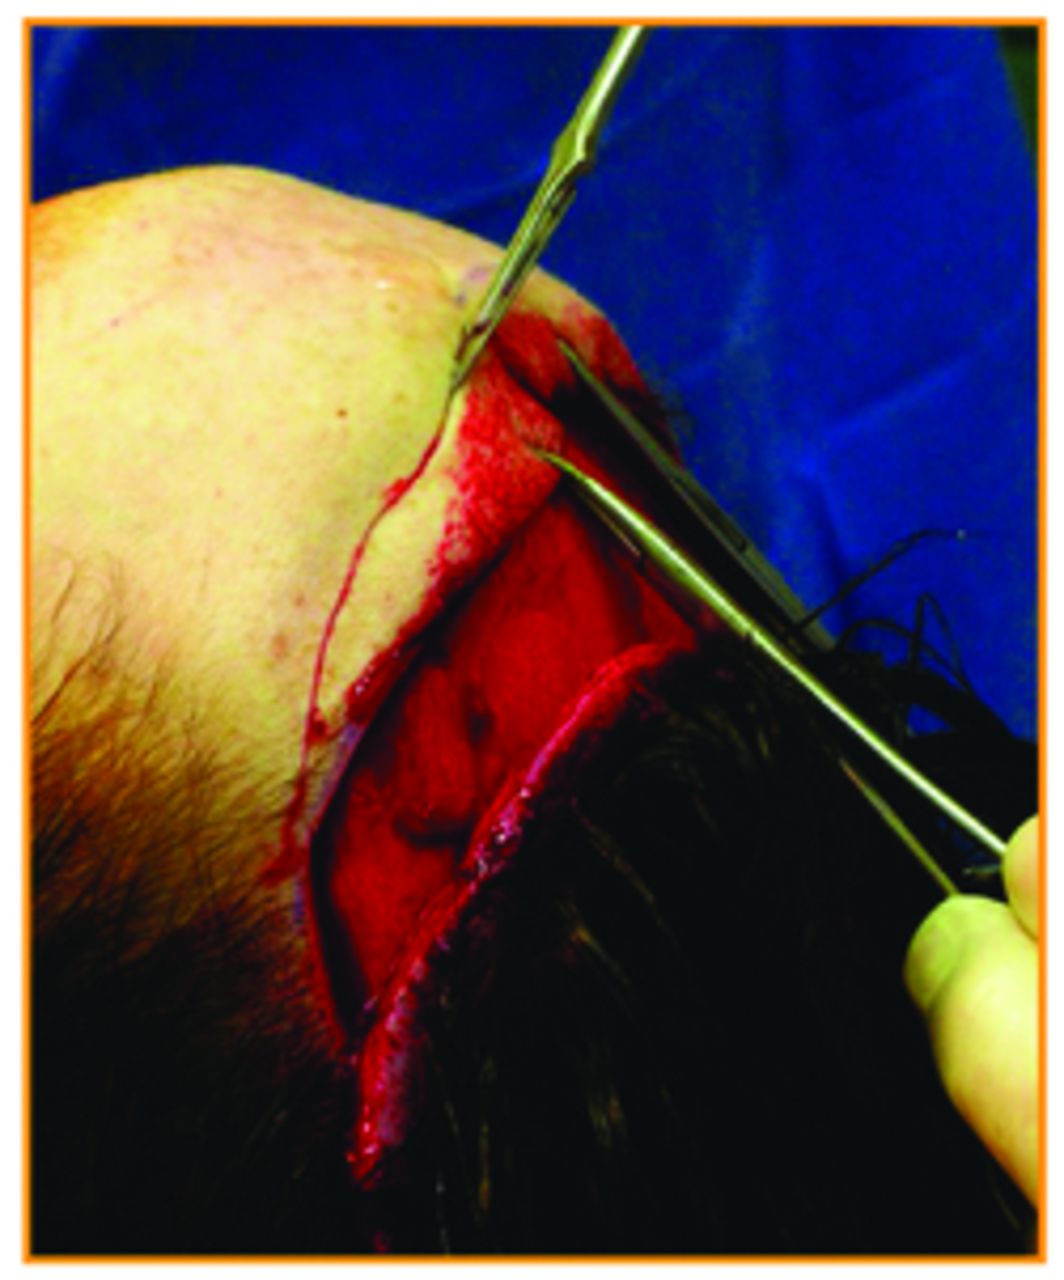
A trichophytic incision (Figures 2 and 3) is made at the hairline (see video), and the hair-bearing scalp behind the incision is lifted in the sub-galeal plane (Figures 4-6). As can be easily seen in the figures (and the video), there is very little vascularity or connective tissue in this plane, so the scalp lifts easily. However, there are two supra-orbital and two supra-trochlear arteries that will be transected at the hairline, so these will need to be cauterized. The forehead scalp is not loosened in order for it to better anchor the advancing scalp. Once all the undermining is complete, the hair-bearing scalp is waist-coated forward (Figure 7) above or below the forehead scalp to see how much of the latter can be removed.

Trichophytic hairline incision transecting follicles.

Temporal-parietal extension of incision to mid scalp.

The scalp lifts easily off the skull.

Finger guides the scissors in the sub-galeal plane.

Galeotomies performed with scalpel (or scissors).

Advancing scalp waist-coated under forehead scalp to gauge forward movement.
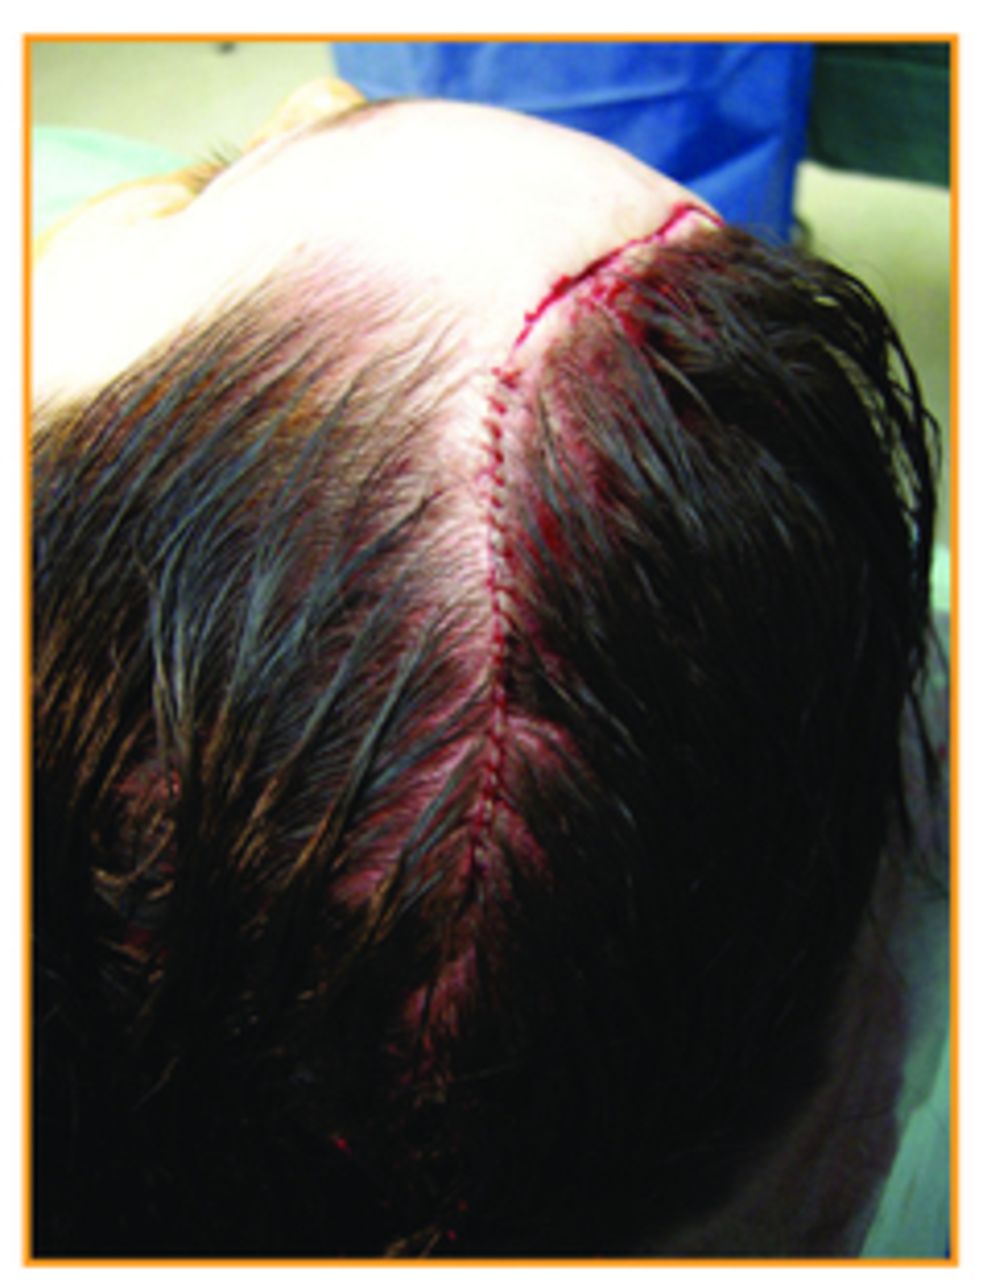
Then, when the appropriate excision has been done (Figure 8), all that remains is to suture the advanced scalp to the forehead scalp in two layers: galea to galea (Figure 9), with strong sutures such as 1 Vicryl, and the epidermis, with fine sutures such as 6/0 Nylon or 6/0 gut (Figure 10). A second ring block is applied at this time in the same location as the first one, with a long-acting local anaesthetic such as bupivacaine or ropivacaine.

Appropriate amount of forehead scalp is excised.

Strong galeal sutures take all the tension of closure.

Surface is closed accurately with fine sutures under no tension.
Clean the hair with saline and conditioner, and apply a wraparound bandage (Figure 11). Give the patient sufficient postoperative pain relief and sedation similar to the pre-medication because there will be a reasonable headache once the second ring block has worn off. Have the patient return the next day (Figure 12) when the bandage can be removed, antibiotic ointment can be used on the sutures, and any form of antiseptic shampoo can be used to wash the hair when they go home. Have them return after 7 days (Figure 13) to remove sutures, and for follow-up again at 1 and 9 months. There may be some temporary shock loss just behind the hairline, but we have not noted any cases of infection, black eyes, or other serious complication.

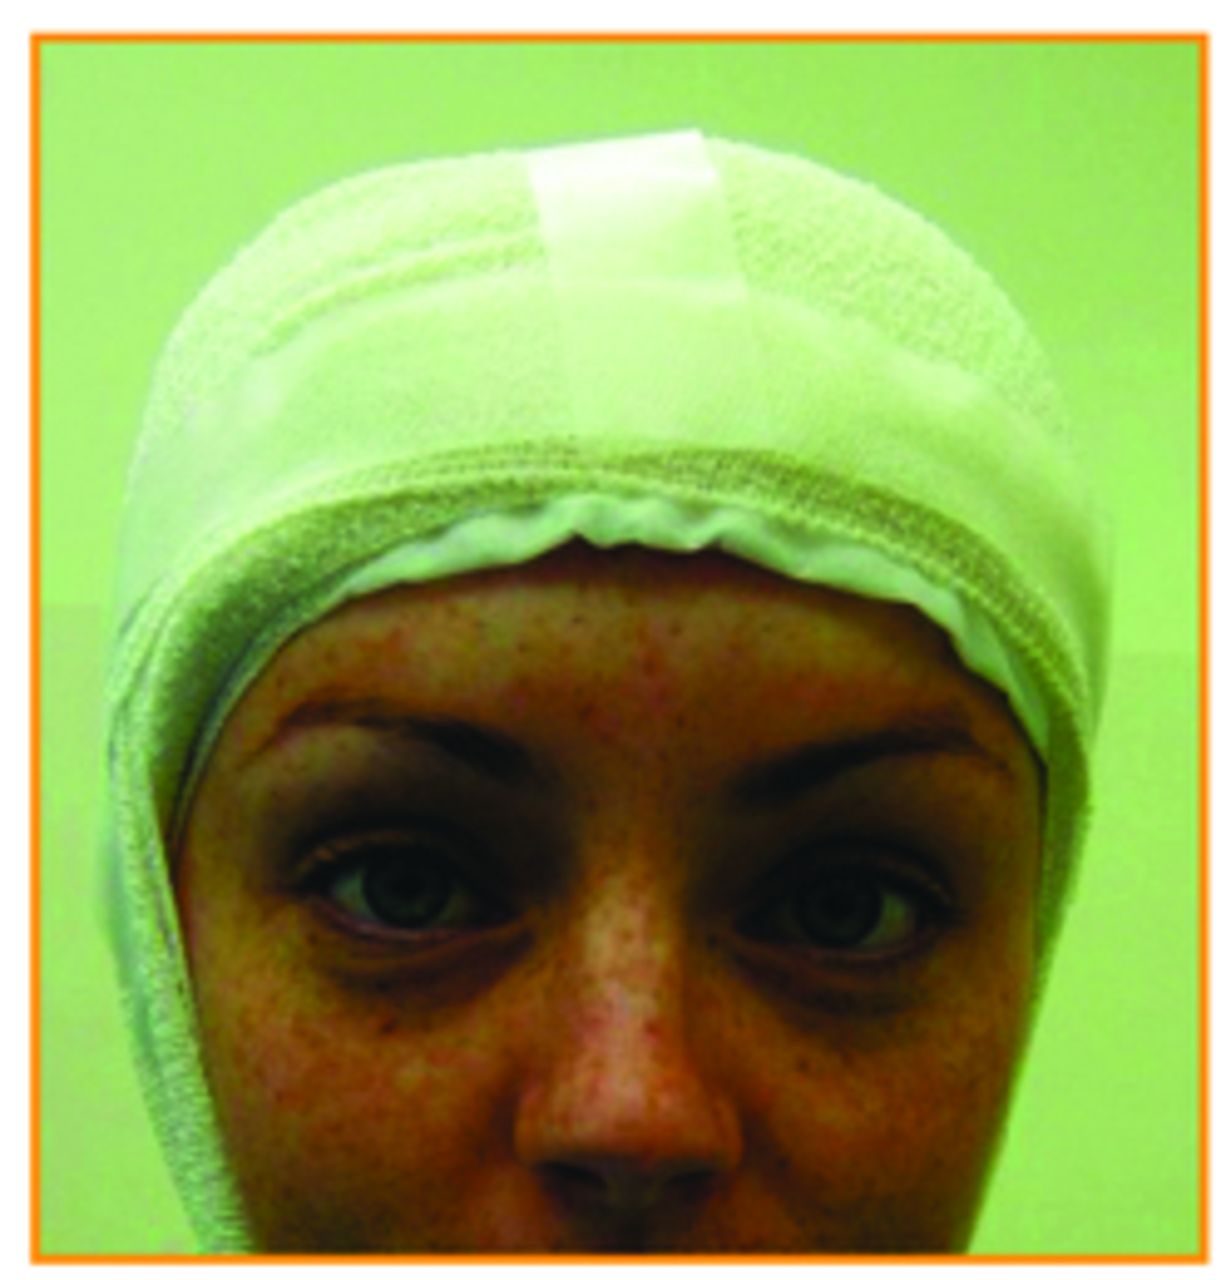
Light bandage for one day.

Appearance at 1 day post-op.

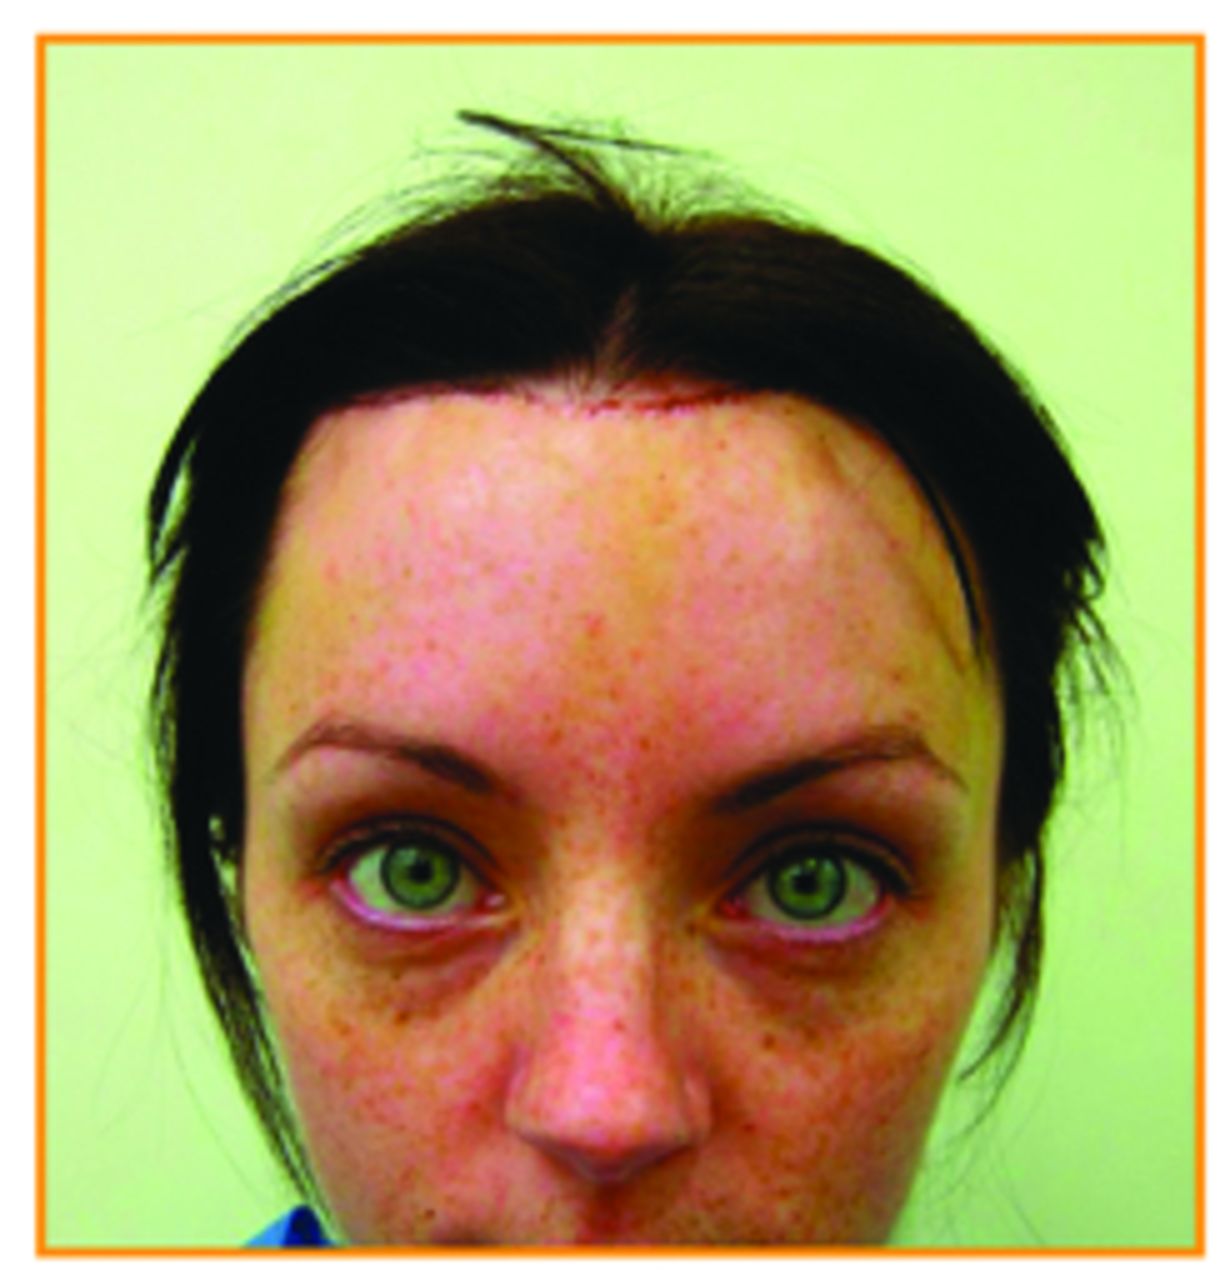
Appearance at 7 days, remove sutures.
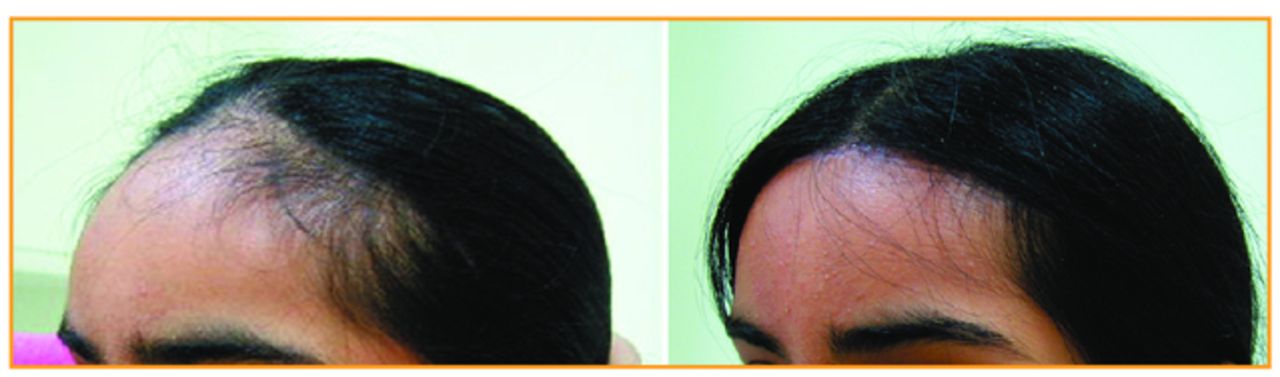
It is important to take photographs at each stage and document everything (Figure 14). Follow the steps in the video closely, look at all the photographs supplied, and don’t be too disappointed if the advancement in the first few cases is less than 2cm. There is a learning curve, so make the patient’s safety a priority, and with care and attention, this procedure will reward both patient and doctor.

Before and after hairline advancement.
- Copyright © 2012 by The International Society of Hair Restoration Surgery
In this issue


Jump to section
Related Articles
Cited By...
- No citing articles found.