

The hair transplantation process consists of two parts: 1) removing the donor follicles, and 2) placing them back into the skin. Both are rate-limiting steps of the process. The patient pays a great price, monetarily, for us to do both of these tasks. If done properly, however, he or she need not pay a large price in sacrificed follicles. Much is said and written about the first part, follicle removal from the donor area. In the most recent meetings of the ISHRS, much time has been spent on the removal process, debating the merits and disadvantages of follicle removal using strip versus FUE. In this article I will discuss the other and equally important half of the procedure, the process of replacing the follicles into the skin.
Traditionally, physicians make the recipient sites into which grafts are placed. I have heard of unlicensed medical assistants doing this task. In the state of Ohio, where I practice, making an incision is the practice of medicine and cannot be delegated to an unlicensed assistant.1 If medical assistants made recipient sites in Ohio, they would be committing a felony—the unlicensed practice of medicine—while the physician would be guilty of aiding and abetting the unlicensed practice of medicine, also a felony. If there are questions about the delegation of medical tasks in your jurisdiction, I suggest you consult your local medical authority.
Traditionally, medical assistants place grafts into the skin, most commonly, the scalp. Although this task can legally be delegated in most jurisdictions, that doesn’t diminish the importance of this process—returning the follicles to the skin. It isn’t difficult to get hair to grow in the fertile scalp; however, much care must be taken to approach cosmetic density and leave the scalp surface unaltered and normal in appearance. Grafts must be placed into recipient sites; making of the recipient sites greatly influences the success of the placement.
If recipient sites are perfectly made, good placing can make up for bad cutting, while good cutting cannot make up for bad placing. If the follicle is intact from skin to dermal papilla, but the graft is irregularly shaped, too big, or too small, good placing can salvage these follicles. If the follicles are not intact due to poor cutting, good placing cannot salvage follicles.
Over the years that I have performed hair transplant surgery, I’ve noticed a wide range in the quality of graft placement. I’ve observed physicians who take the utmost care in removing and preserving follicles only to hand them off to placers who leave them half hanging out of the scalp with little chance of survival. I’ve talked with physicians about differential graft placement (assessing every follicle in every graft and placing the graft in the scalp where it would have the greatest positive effect) asking them if their placers do this, only to be met with blank stares. While I have placed many grafts over the years, over the past four years, I began placing approximately half the grafts myself in every case. My only other assistant, who has worked with me for over 13 years, places the remaining grafts. While spending many hours making incisions and placing grafts, I have had time to contemplate and comprehend the smallest details, subtleties, and finesse necessary to get excellent growth and natural results. In so doing, I have made the observations and developed the theories described below.
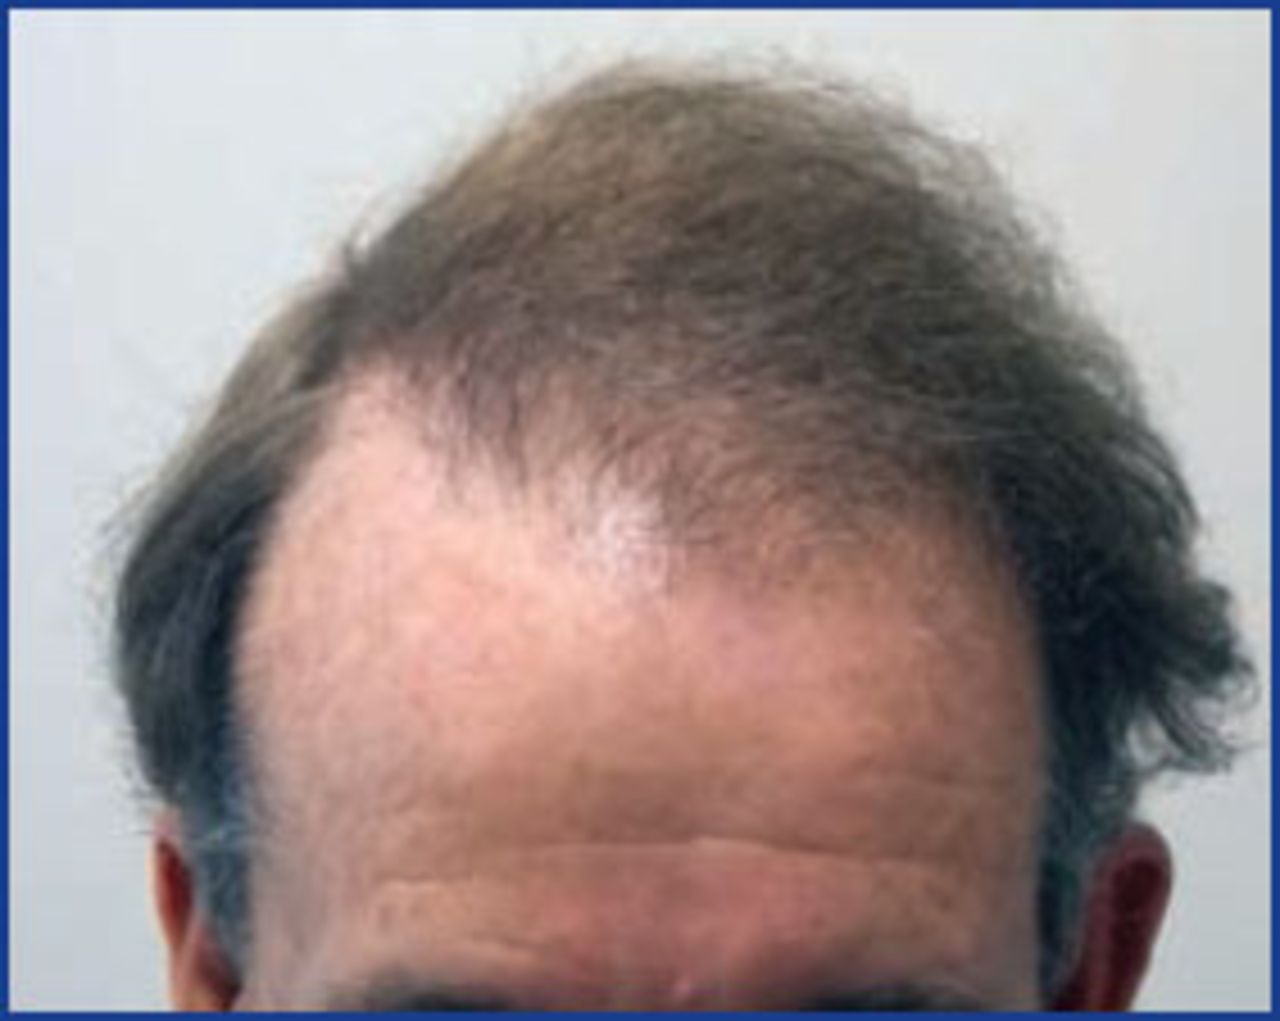
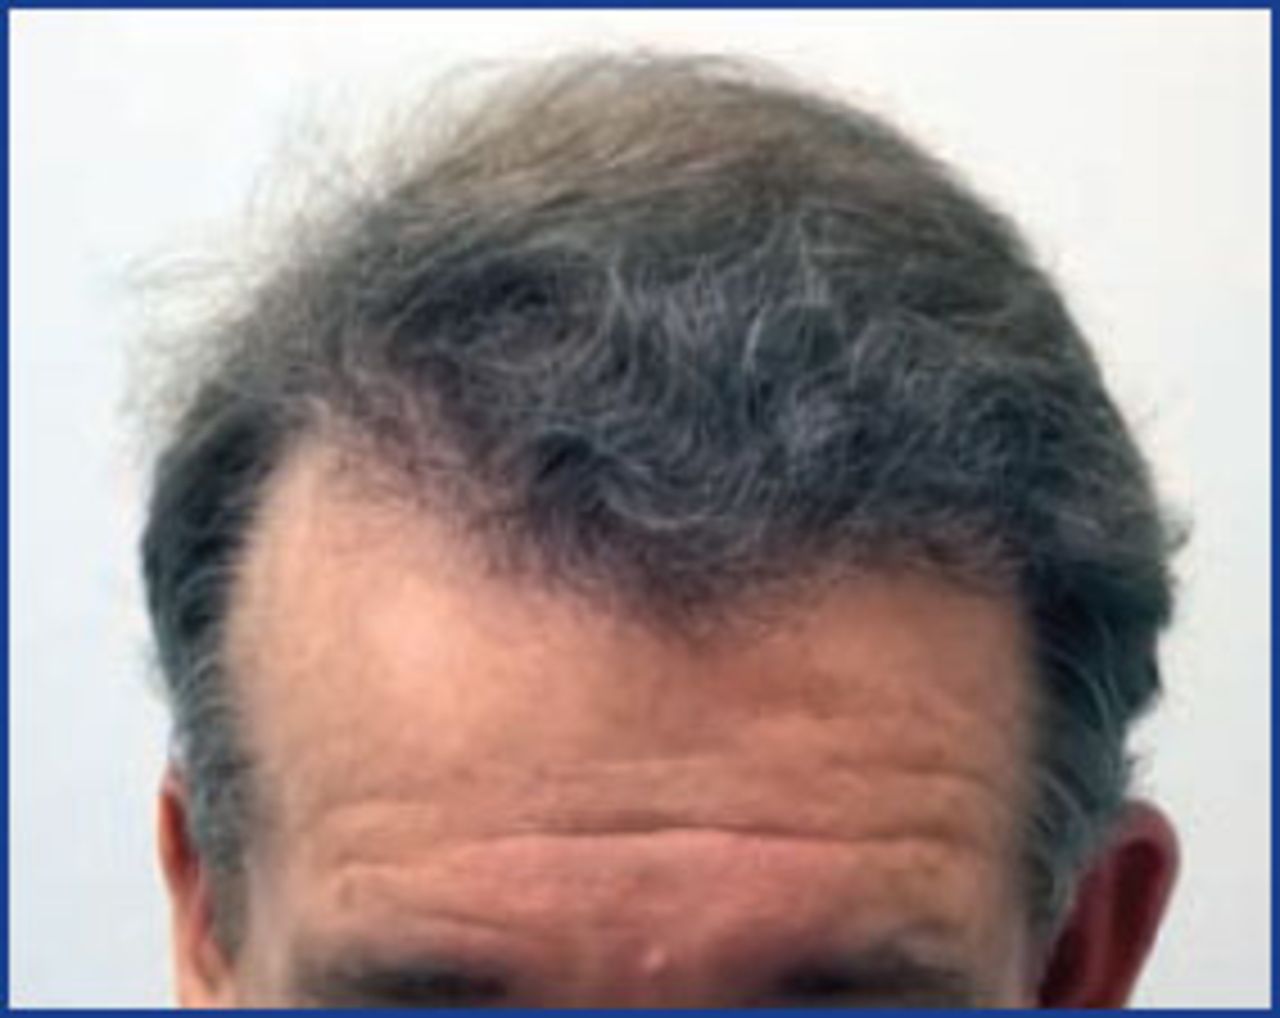
With each surgery, my goals are: 1) 100% growth of placed follicles, 2) natural distribution of transplanted follicles, 3) natural growth angles, 4) unaltered scalp surface after healing (do no harm), and 5) the best results possible (Figure 1). To reach these goals, I have found the following to be mandatory: 1) high magnification (I use 4.5× loupes) for recipient site creation as well as for placing, 2) limited depth recipient sites, 3) variable width recipient sites, 4) pain control and hemostasis, 5) differential (graded) graft placement, and 6) the skill, experience, and desire to attain the above goals.
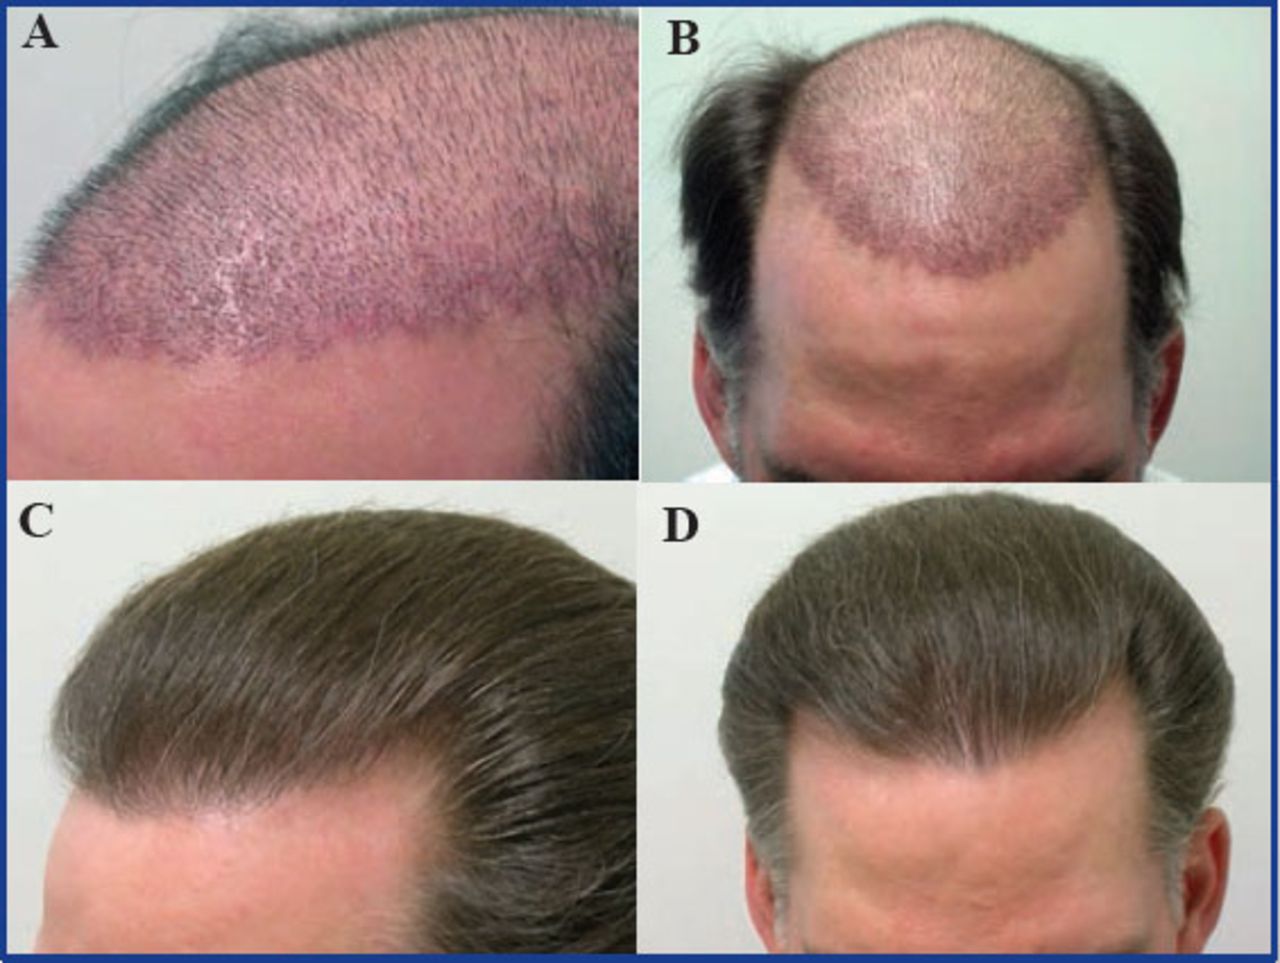
A: (top left) 12 days post-op: 3,000 grafts; B: (top right) 12 days post-op: 3,000 grafts; C: (bottom left) 1 year post-op: 3,000 grafts; D: (bottom right) 1 year post-op: 3,000 grafts
Physicians and staff often resist the use of higher magnification (Figure 2) due to headaches, nausea, and decreased speed. After a short time, symptoms resolve and speed increases. Increased density can be achieved with higher magnification by using smaller blades to make incisions closer. By identifying the subtle changes that signal an incision was made, a spot of blood and/or irregular surface contour, fewer graft sites are missed and fewer grafts damaged leading to greater density.
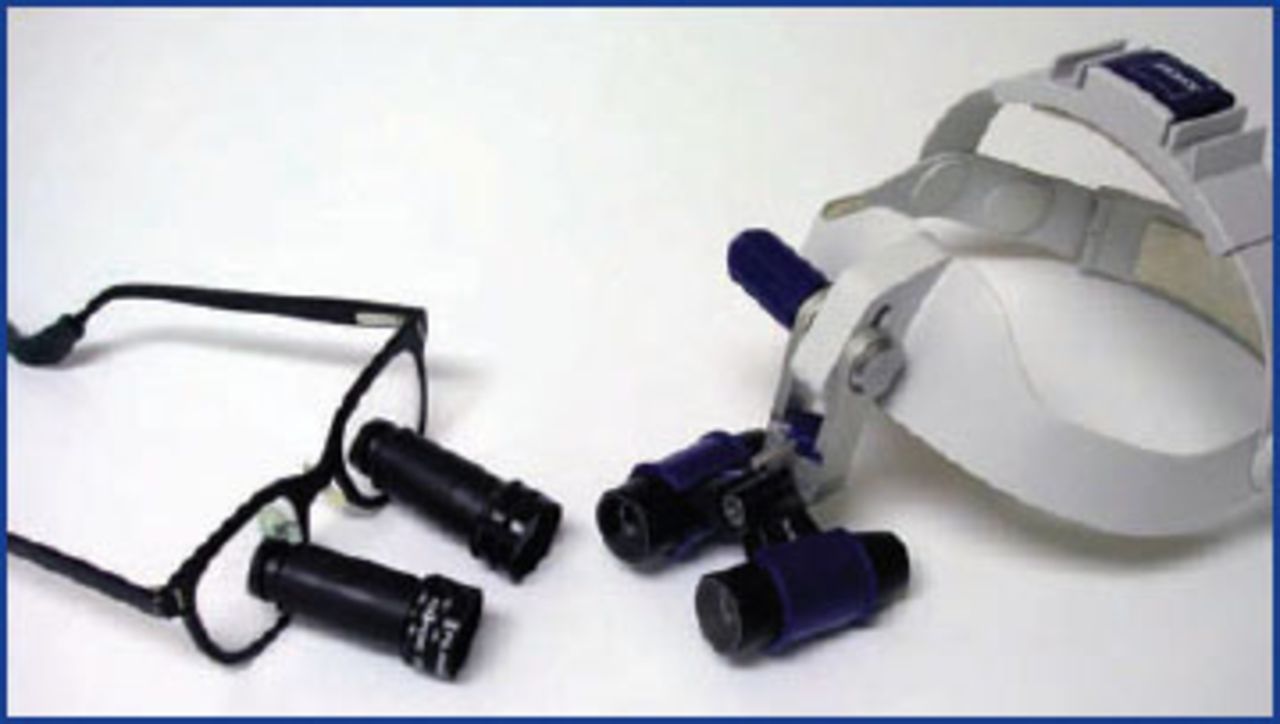
Left: Designs for Vision; right: Zeiss
Recipient Site Myths
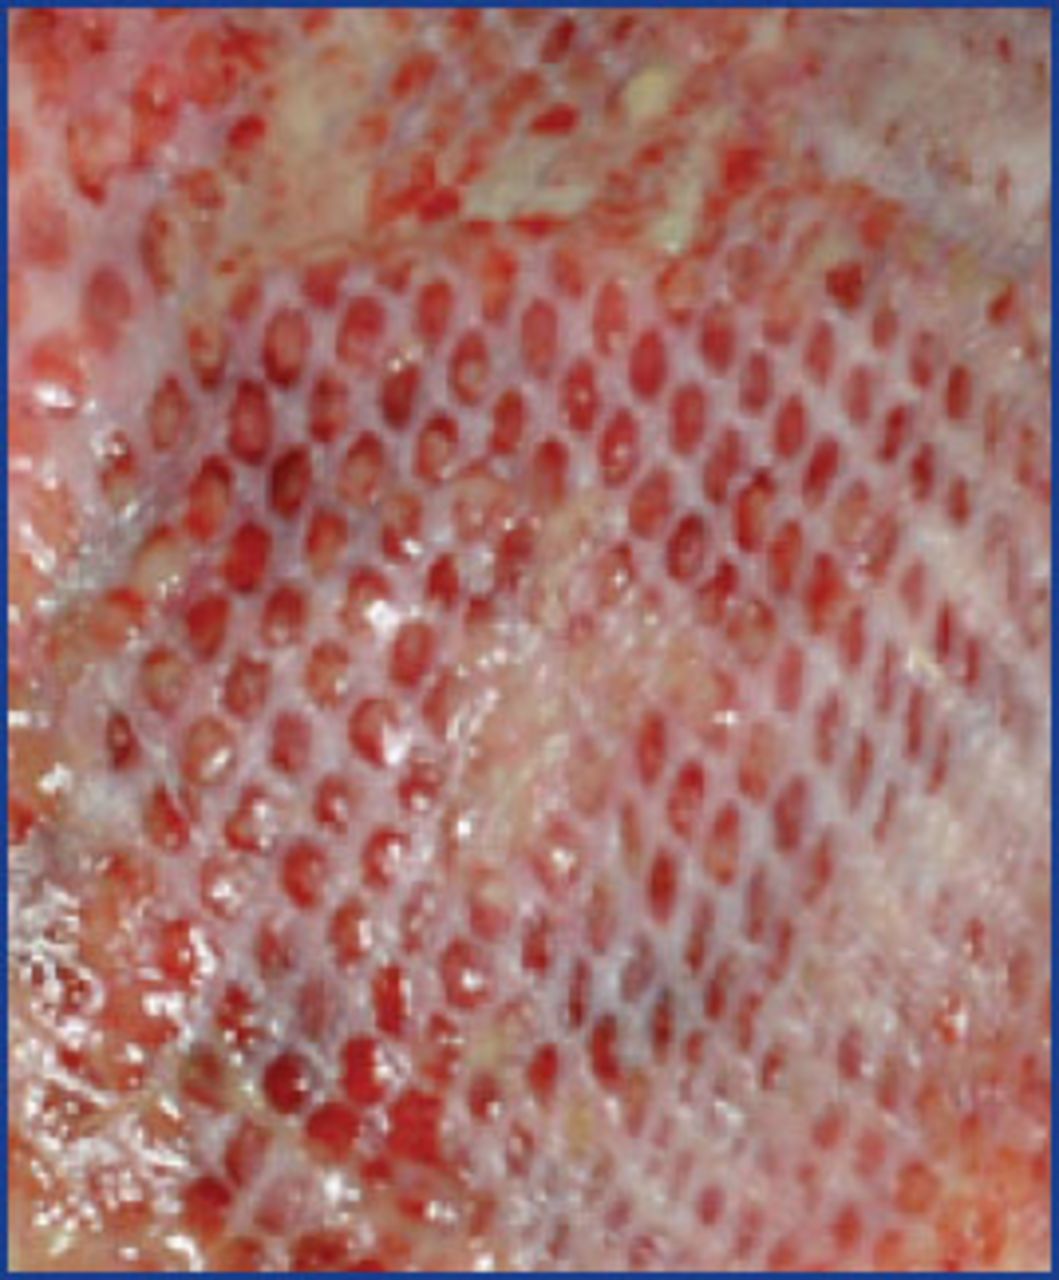
Two myths exist concerning the creation of recipient sites. The first myth is that grafts placed into incisions increase the volume or expand the scalp with negative consequences such as surface contour alterations. Since volumetric expansion can negatively alter the scalp surface, in whatever way tissue is added to the scalp, the goal should be a non-volumetric expansion of the scalp. By this I mean it is ideal to add tissue to the scalp without removing tissue or expanding scalp volume. Incisions provide this expansion by relaxing elastic fibers and creating space to compensate for the volumetric increase caused by adding tissue to the scalp. This full-thickness fenestration of the scalp allows for the addition of grafts without altering the contour or surface of the scalp if the space created is equal to the volume added (Figure 3). This action on the scalp is similar to creating an expanded, or meshed, split-thickness skin graft (Figure 4). Incision depth and width need to be precisely measured to accurately create the space necessary to accommodate the tissue added without an increase in volume.
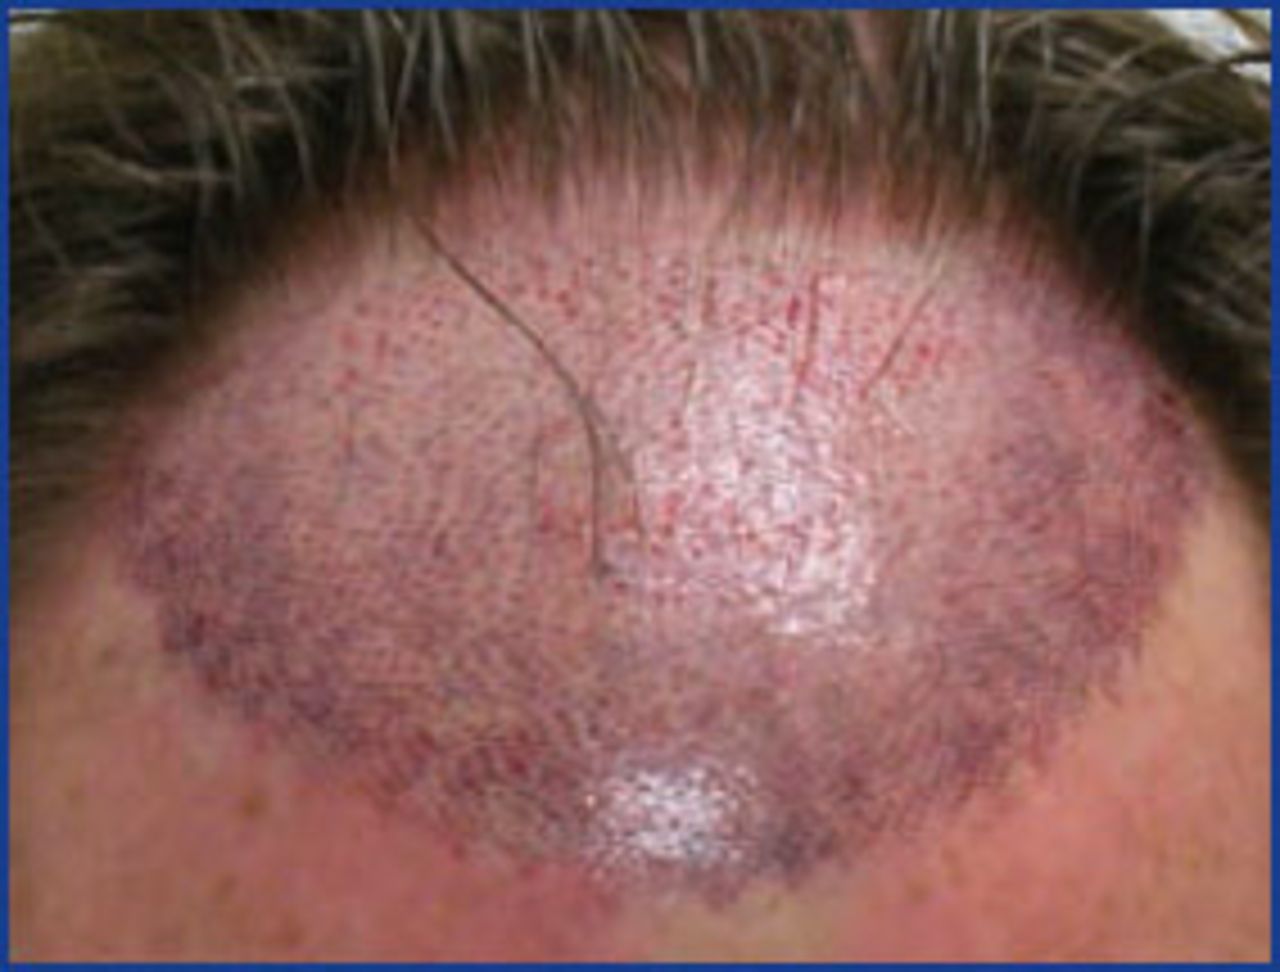
Scalp incisions, 2,800

Meshed split-thickness skin graft
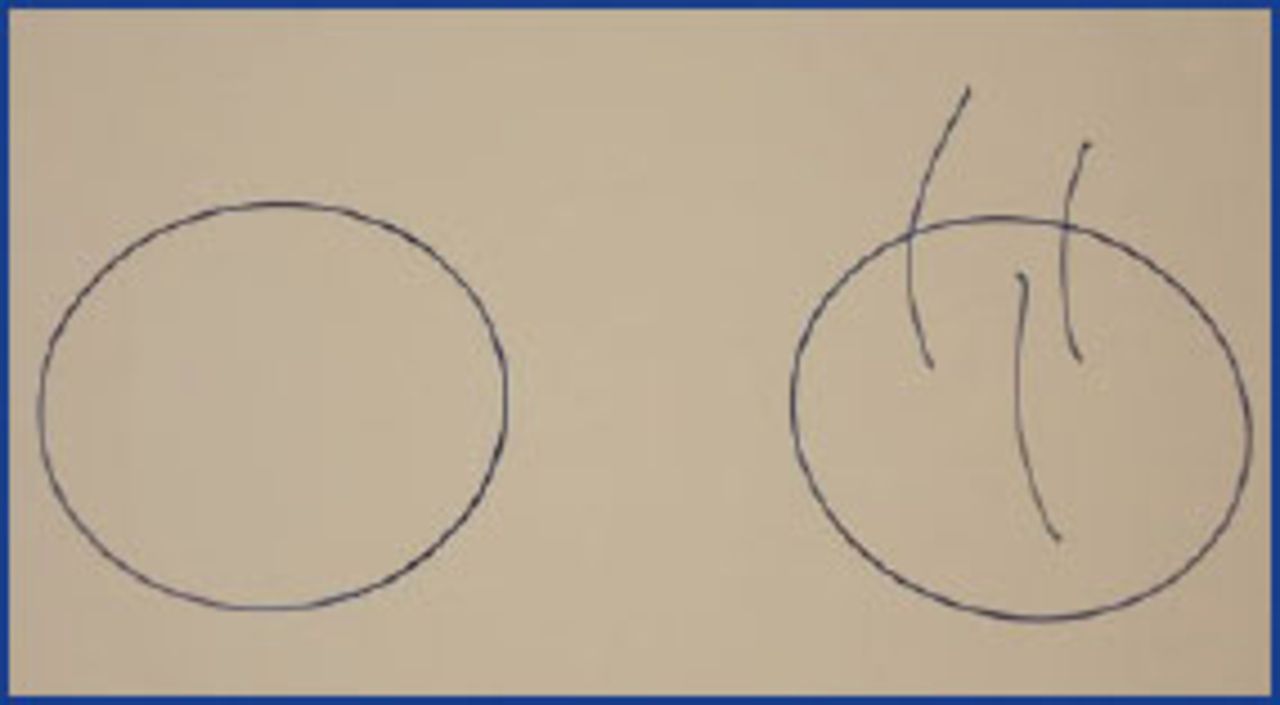
The second myth is that punches are preferable to incisions since they remove bald scalp. Punches do remove bald scalp if there are no existing follicles in the recipient area, but the graft replacing the bald skin removed is 98% bald itself. If you calculate the surface area of a 1mm-diameter graft and subtract the surface area covered by three hairs of average hair shaft diameter, you will find the remaining uncovered, bald surface of that graft is 8%. Therefore, when a 1mm-diameter piece of bald tissue is removed and replaced with a 1mm-diameter 3-hair graft, the net removal of bald tissue is 2% (Figure 5). That removal is with the expense of a circle of contracting scar tissue that forms due to each punch and the unnecessary removal of vital epidermis, dermis, blood vessels, nerves, and organelles, as well as subcutaneous fat. Grafts can be placed easier and faster into holes made by punches, but recipient sites made by incisions cause far less damage and result in no removal of vital tissue. Therefore, I use cut-to-size chisel-shaped blades to make recipient sites varying the blade width by 0.1mm and limiting depth by grasping them with a needle holder.

Myth #2
Repetitive placement trauma (RPT) refers to multiple attempts to place the same graft. Ideally, a graft should only be placed once. Each successive attempt causes damage, decreasing the chances of survival for the follicles in that graft. This has also been referred to as the “H,” or human, factor.2 The most common reason multiple placing attempts are required is popping of the graft, the graft being extruded from the recipient site, after the first attempt at placing. Popping is due to inaccurate depth, width, and spacing of recipient sites and/or poor control of bleeding. This will be discussed in more detail later.
Bleeding can severely decrease the ability of the skin to hold the grafts in place (hold ability) and must be controlled to prevent RPT. Local anesthetic and epinephrine generally lose their effect simultaneously. When increased bleeding during recipient site creation or placing occurs, I always ask the patient if he or she is feeling pain. Since pain may be minor, patients often don’t report it to avoid more injections. The scalp should be re-injected with anesthetic (usually containing epinephrine) to stop bleeding since the pressure from under the graft can act like a hydraulic pump extruding the graft. The most powerful stimulus for clotting is tissue. The more accurate the fit and placement is (full contact of the graft surfaces with the internal incision surfaces), the greater the stimulus for clotting, and therefore less bleeding, popping, and RPT. Some placers stop bleeding by jamming the epidermis of the graft below the epidermis of the scalp, which can cause unsightly pitting.
Creating Recipient Sites
Hair exits the scalp in varying angles. The angle of the incision determines the exit angle of the growing transplanted hair and should mimic the lost hair and/or surrounding existing hair to create natural flow after growth (Figure 1d). Miniaturized hairs are almost always present as a guide to incision angle, if not, the angle should be based on experience or the reference of another’s scalp.
Ideally, existing follicles below and hair shafts above the surface should be left unharmed when making recipient sites. Damage to existing follicles below the scalp surface can lead to temporary or permanent shock loss reducing overall density. If existing hairs are cut above the surface, additional temporary shock loss will be seen. To avoid damage to existing follicles, incisions should not be made too close to existing hair shafts and the angle of the recipient site must be parallel to the angle of the existing follicle. I will make an incision equal distance between two existing hairs to prevent damage to those follicles. This makes placement easier as it reduces the chance of dragging existing hairs into the incision. If an existing hair is trapped under a graft, it can act as a slingshot, launching the graft out of the site when the hair is moved or combed. It is ideal to clear the area of existing hair shafts prior to placement to prevent their entrapment. Alternatively, trapped existing hairs can be removed after placement of the graft.
Some physicians use no depth gauge to limit the depth of their incisions. To prevent volumetric expansion correct recipient site depth is imperative. I place a few grafts on my finger then put the chisel-tipped blade I use next to the grafts to measure the length of the graft to determine the depth of the incisions. Grafts and individual follicles can vary, usually slightly, in length. Generally, I make the blade the length of the longest graft or follicle or 0.1mm shorter (when there is a lot of variability). After determining the follicle length, I measure it, and then set all new and/or different sized blades to this depth. A placement trial is done prior to making the incisions.
In general, the greater the angle of the hair in an area, the deeper the incision needed. While I don’t change depth due to every small increase in angle, I do increase depth when transplanting into temporal points, side burns, eyebrows, mustaches, and other areas of acute angulation. Since placing is more difficult in these areas, I often increase width by 0.1mm to prevent trauma during placement.
To prevent volumetric expansion, correct incision width is as important as correct incision depth. Chisel point blades are preferable to spear point blades since they maintain incision width into the subcutaneous tissue and prevent compression of the bulbs. This can increase follicle survival and help prevent post-transplant kinkiness. Blades are cut from Personna™ double edge razor blades using the Cutting Edge™ blade cutter, which can vary the width by 0.1mm (Figure 10). The larger or more hairs per graft, the wider the blade used. I transplant only follicular units of 1, 2, and 3 to 4 hairs, and generally use three blade sizes increasing 0.1-0.2mm per graft size. For 1-hair grafts, I use 0.7-0.9mm-wide blades; for 2-hair, 0.9-1.1mm; and for 3- to 4-hair grafts, 1.1-1.3mm. If a graft with the same number of hairs in it varies in size, two different sized blades can be used to accommodate those grafts. For instance, if there are big and little 1- and 2-hair grafts, a 0.8mm blade can be used for small 1-hair grafts, a 0.9mm blade for large 1-hair and small 2-hair grafts, while a 1.0mm blade can be used for larger 2-hair grafts. The middle sized, or flex blade, can be used for either 1- or 2-hair grafts at the discretion of the placer. In some patients, I will use up to six different blade sizes to perfectly accommodate all grafts.
Sharp point blade incisions narrow at the bulb level: chisels leave more room for the bulbs compared to the sharp points. I don’t like needles because they weren’t designed to make incisions, they were designed to make a hole in a vein or artery. The bevel causes unnecessary trauma.
Graft Placement Trials
No two patients’ tissues are the same. To assess important variables and parameters, a trial of 10 or so recipient sites should be made and grafts placed. The perfect fit of the graft into the tissue can be determined, which will determine the success of the outcome. As little as a 0.1mm miscalculation can make a huge difference. It can be a nightmare to make 2000 incisions only to find the depth, width, angle, or spacing was miscalculated.
During a placement trial, the spacing of incisions is evaluated. The spacing, or distance, between incisions is extremely important. If incisions are made to close, popping during placement can occur, again, leading to RPT and decreasing yield. If one graft is extruded when an adjacent graft is placed, this is an ominous sign that the incisions are too close. When the volume of one graft causes the adjacent graft to come out, if incision spacing isn’t increased, placers are in for a long, tedious day of repetitive placement that will result in decreased yield and, potentially, an unhappy patient. Follicular units are generally evenly spaced in the donor area. Therefore, when no, or few, hairs are present in the recipient area, I use a repeating diamond shape pattern with incisions evenly spaced. The even spacing of the incisions equally disperses any pressure created reducing the chance of popping.
A placement trial also assesses the “hold ability” of the patient’s scalp skin or how well the grafts stay in the incisions and resist popping. The patient’s inherent elasticity is the primary determinant of hold ability, but it can be affected by a variety of factors, including scarring, sun damage, and advancing age, all of which reduce elasticity and hold ability. Beware of patients with fibrotic skin in general whether from aging or systemic disease (scleroderma). My suspicion starts if, when I shake the patient’s hand upon meeting, his hand is tight and fibrotic. We could be in for a long day. Hair shaft diameter is a determinant of graft size, the greater the diameter the larger the graft. If large grafts are placed into recipient sites made too small, the pressure on the lateral wall of the site can be transmitted to the adjacent placed graft causing it to pop. Greater than normal oil production from large sebaceous glands can cause grafts to be slippery, which will decrease the hold ability. Patients with facial acne scars from cystic lesions or with active acne should be suspect. Assistants performing strip dissection can alert the physician, large sebaceous glands can be seen with magnification during strip dissection.
Differential or Graded Graft Placement
All grafts with the same number of hairs are not equal. Differential or graded graft placement refers to the practice of examining each hair in a graft and each graft carefully, based on its structural integrity and the chance it will grow, then placing the highest graded grafts in the areas of greatest cosmetic priority. The placer must have the skill, experience, and desire to judge each graft and place it appropriately. I will start placing at the anterior or posterior edge of an incision size zone, then proceed in the opposite direction filling the sites consecutively like the advancing edge of a wave in that incision size zone. If a graft is deemed to be of lower quality, it is placed in an area of lesser importance. This requires skipping around or placing in multiple locations simultaneously. As an example, thinner, viable, intact, 1-hair grafts are placed in the front row of the hairline while thicker single follicles are placed in the second row. The best 2-hair grafts with thick, intact follicles are placed behind the 1-hair grafts in the thinnest areas and on the part side, the same with 3- and 4-hair grafts. Three- and 4-hair grafts are placed in the central frontal area to increase its density when space between existing hairs is present. Grafts of lesser quality are cosmetically hidden by being placed in areas of lesser cosmetic importance at the time of grading or set aside and placed at the end of the case. These areas include the non-part side and areas of greater, but in need of, increased density. Grafts containing different numbers of follicles and of differing quality are like colors on a palette, allowing the artist to shade areas of the work with different colors (Figures 1c and 1d).
Graft Placement Techniques
I prefer to hold grafts on the lateral aspect of the gloved index finger of my non-placing hand near the DIP (distal interphalangeal) joint. Approximately 10 grafts, in a bubble of holding solution, are held at a time as such. More or fewer grafts can be held on the finger based on placing speed. It is imperative not to allow grafts to become dehydrated. Other methods of holding grafts just prior to placement can be used including a finger cup.
I cannot overstate the importance of gentle handling of the grafts with forceps during placement. I gently grasp and gather the follicles at or below the dermal papillae with the end of the forceps at about a 45° angle to the hair shafts. It is preferable for those dissecting the strip to leave fatty tissue inferior to the bulb to grab, when possible, as opposed to grabbing the actual dermal papilla. With the graft between the forceps’ jaws I find the opening of the incision with the tip of the forceps and gently slide in the tip of the forceps. If the proper angle is followed, the graft will easily follow the forceps. The feeling is similar to putting Legos™ together. When the pegs on two pieces are perfectly lined up, they slide together with a distinctive lack of resistance. If a graft is incompletely placed, a follicle or follicles not fully inserted, there will be an increase in resistance during placement and greater potential for popping. The most difficult move to learn is removing the forceps from the incision leaving the graft in place. I use a cotton-tipped applicator to hold the graft in place while the forceps are removed, then grasp the graft a little higher to insert more, then repeat as if climbing a ladder until the graft is in place. After the graft is placed, it can be adjusted to make it horizontal in relation to the scalp.
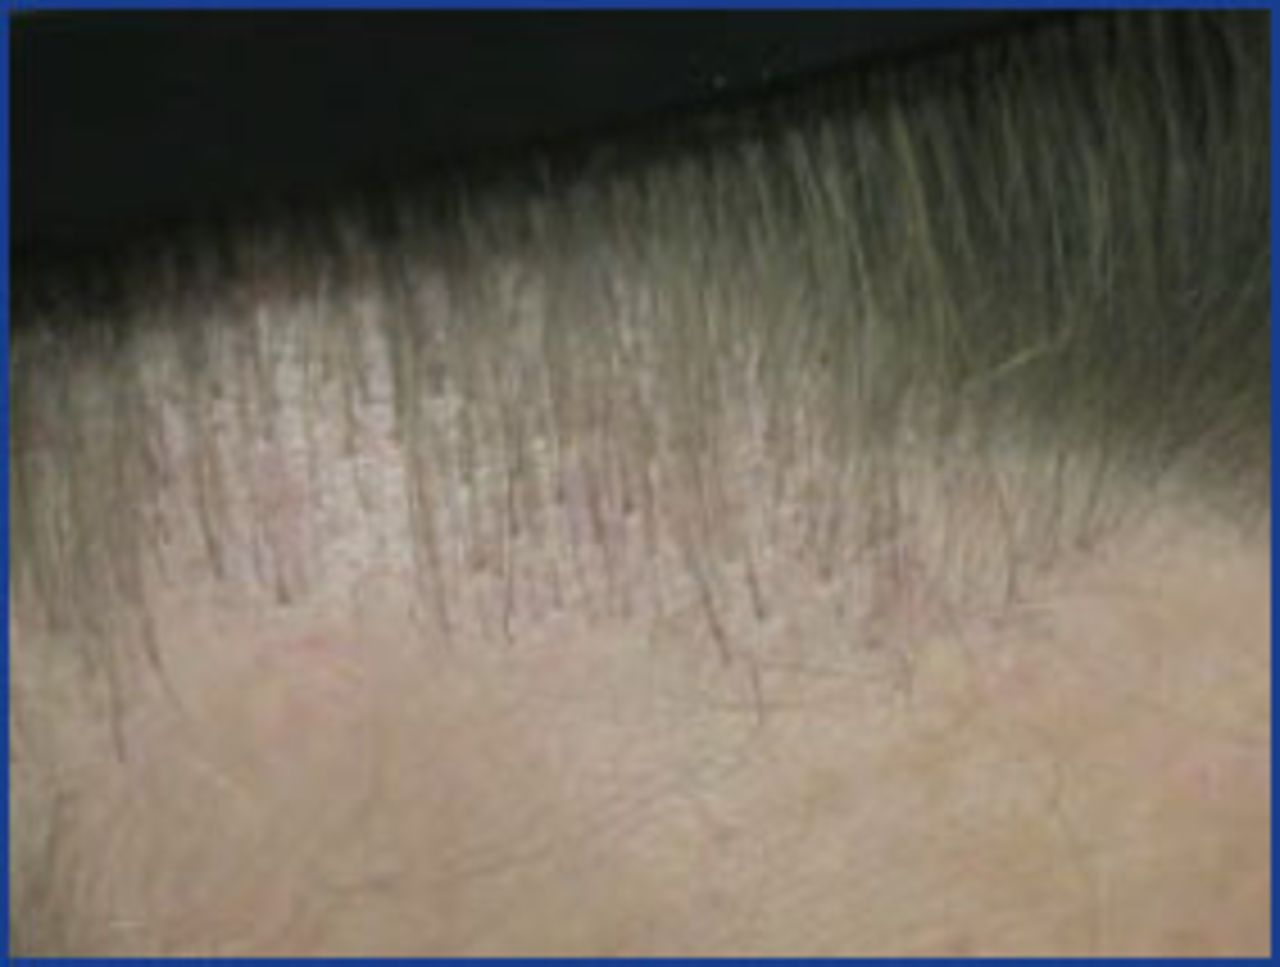
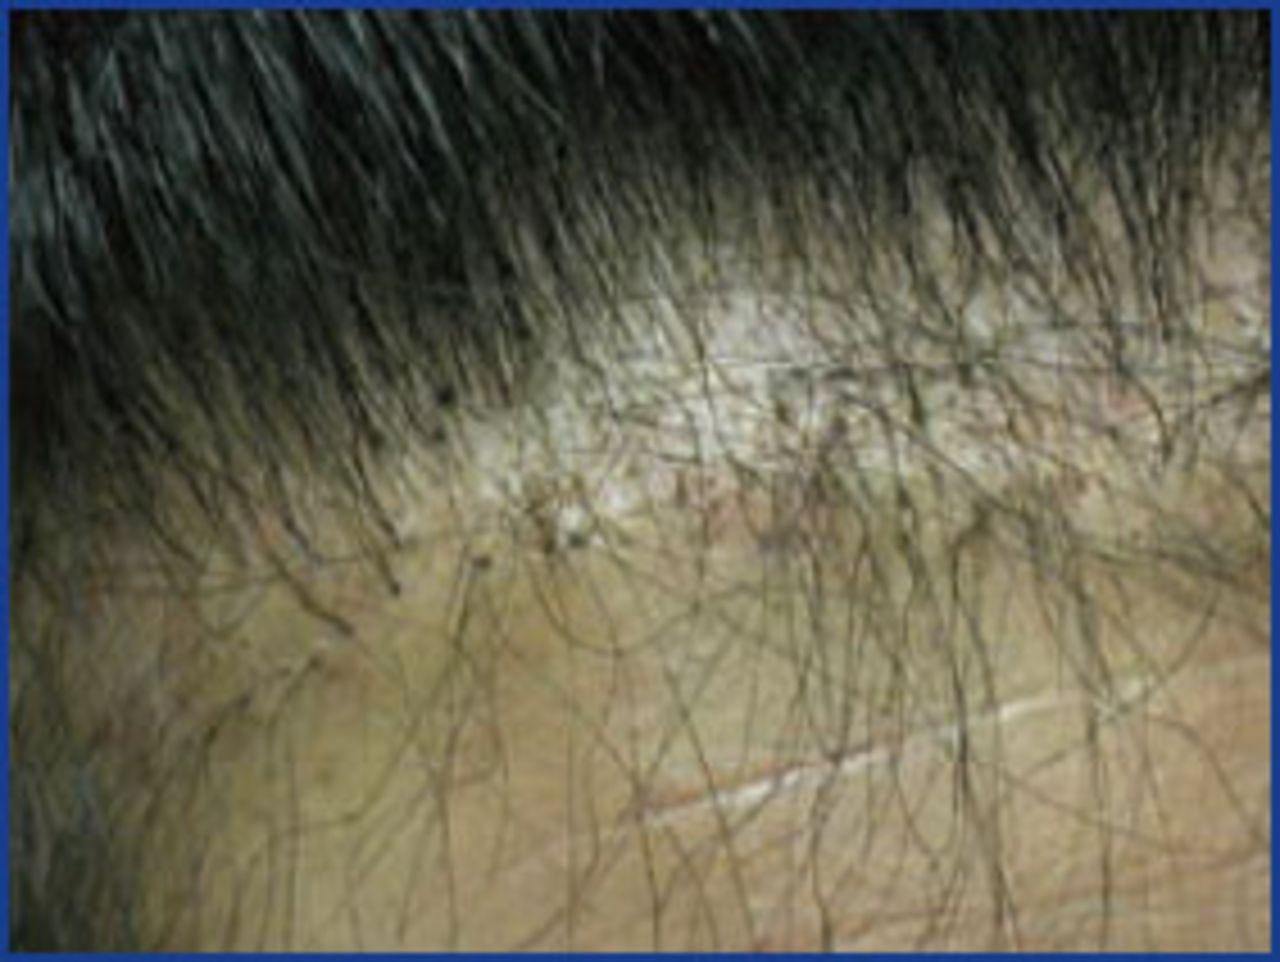
The epidermis of the graft remains approximately ½ millimeter above the epidermis of the scalp, thus acting as an important marker to avoid placing the top of the graft below the skin preventing ugly pitting or a depression in the scalp surface (Figure 6). If the grafts are placed too deeply, after healing, a deep pit can form that blocks the reflection of light creating an unsightly black hole (Figure 7) More subtly, it can look like the well or crater around the base of a tree after the snow melts around the tree trunk (Figure 8). This elevated epidermis will slough after 7-10 days leaving the scalp surface smooth and unaltered. If the graft is buried into the dermis/subQ, or if one graft is placed on top of another in the same incision (piggy backing), an inclusion cyst or small abscess can develop. Isolated inflammations, infections, or cysts usually don’t effect growth and overall density, but multiple such lesions can reduce follicular yield. If the incisions are made too shallow and grafts left elevated more than that which can slough, a visibly bumpy scalp will be the result. Too shallow incisions can also lead to popping and subsequent RPT. Repeatedly jamming grafts into too shallow incisions may disrupt the cuticle of the hair shaft leading to post-transplant kinkiness (Figure 9). It is not uncommon to see multiple types of deformities in one patient due to improper recipient site creation and graft placement.

Immediate post-op

Pitting, compression

Pitting, compression

Post-transplant kinkiness, compression, pitting, ridging
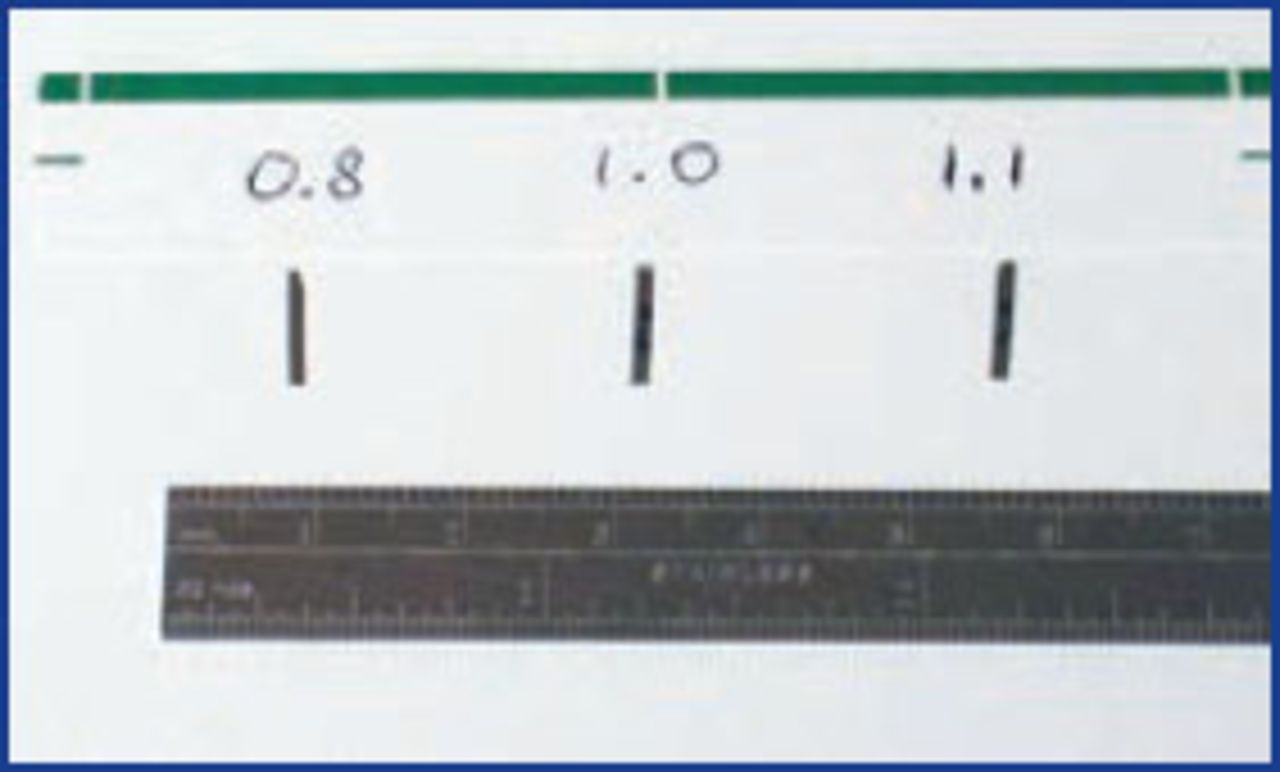
Chisel point cut-to-size blades
Grafts forced into incisions too narrow also can cause popping leading to RPT. A scalp surface abnormality called ridging, the formation of an elevated ridge, can occur secondary to localized volumetric expansion of the scalp when grafts are forced into an incision that is too small (Figure 9). Compression of grafts larger than one hair can result when placed into too narrow an incision. Compressed grafts are unsightly as they stand out since they are denser than the surrounding naturally spaced follicles and have a tufted appearance. Grafts placed into incisions made too wide can fall out or can move around in the incisions resulting in mis-angled growth. After 10 incisions are made for each graft size, grafts are placed then removed and examined as a trial to determine if the incisions are too deep or shallow and/or too wide or narrow.
In the scalp donor area, the hair shafts exit the skin pointing inferiorly. As a result, the follicle’s exit from the surface of a graft, either dissected from a strip or by FUE, will create an acute and obtuse angle in relation to the graft’s epidermis. Grafts can be placed so the acute angle is facing anteriorly or posteriorly and vice versa for the obtuse angle. In general, the acute angle should be placed forward or in the direction the hair is intended to grow (Figures 11 and 12). Grafts should be grasped by the forceps with the acute angle properly oriented and placed as such, if not, the proper position can be achieved by rotating the grafts during or after placement. After such rotation, be sure to check that the follicles are not twisted or distorted to prevent post-transplant kinkiness. Orienting the epidermis of the graft perfectly horizontal with the scalp contributes to an unaltered scalp surface after healing.
Acute angle to the left

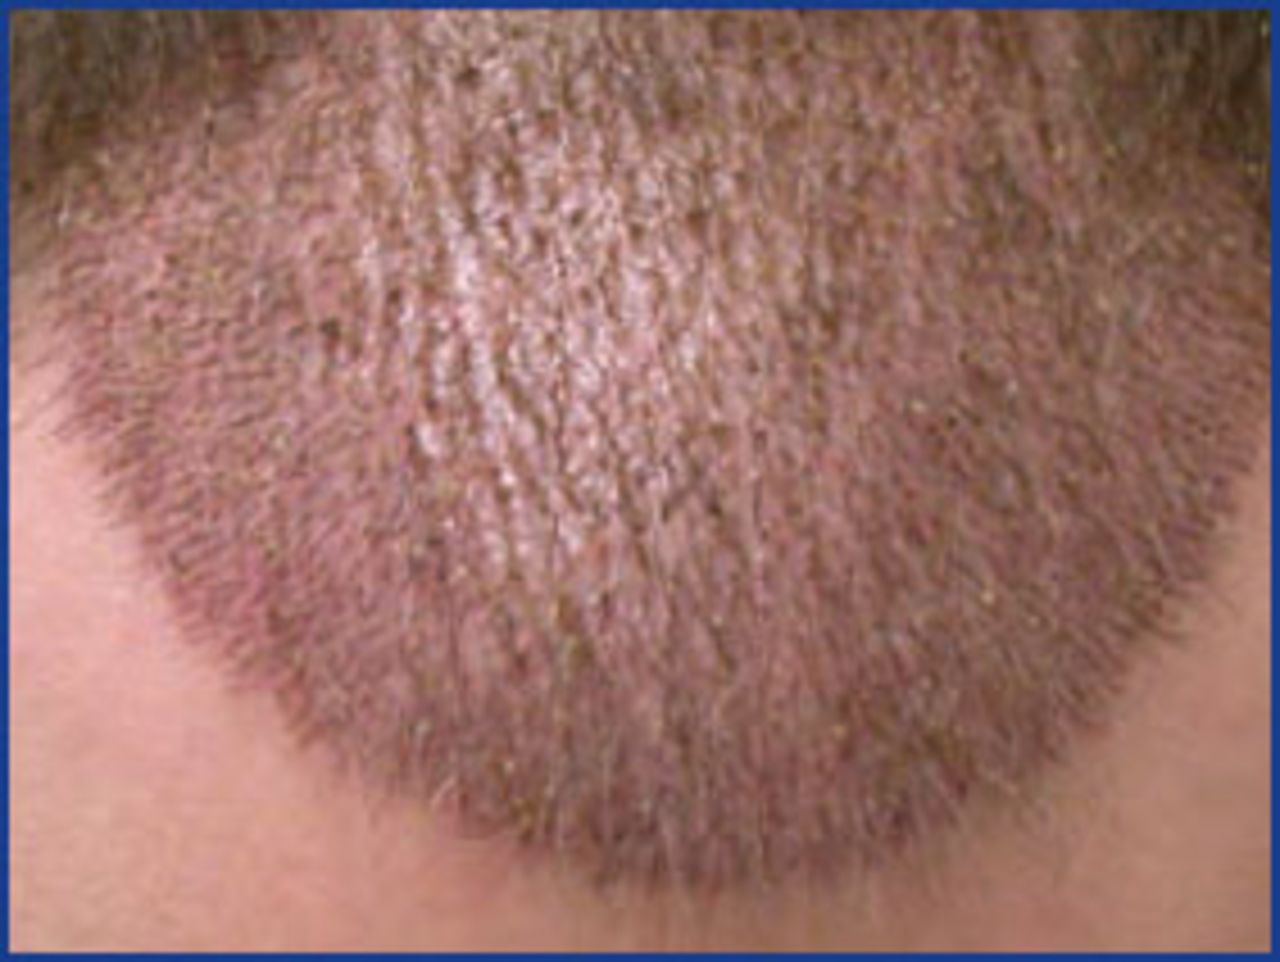
10 days post–op, 1,600 FUE
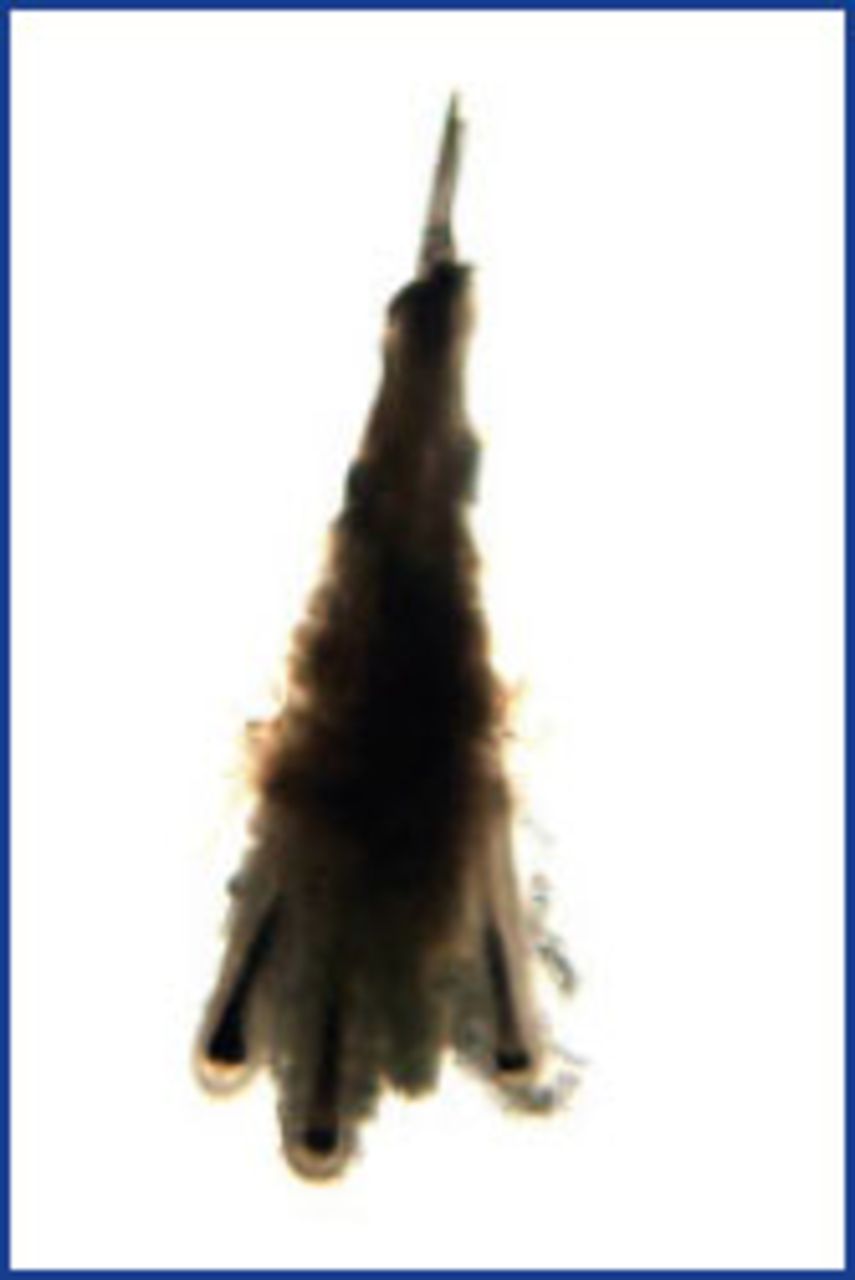
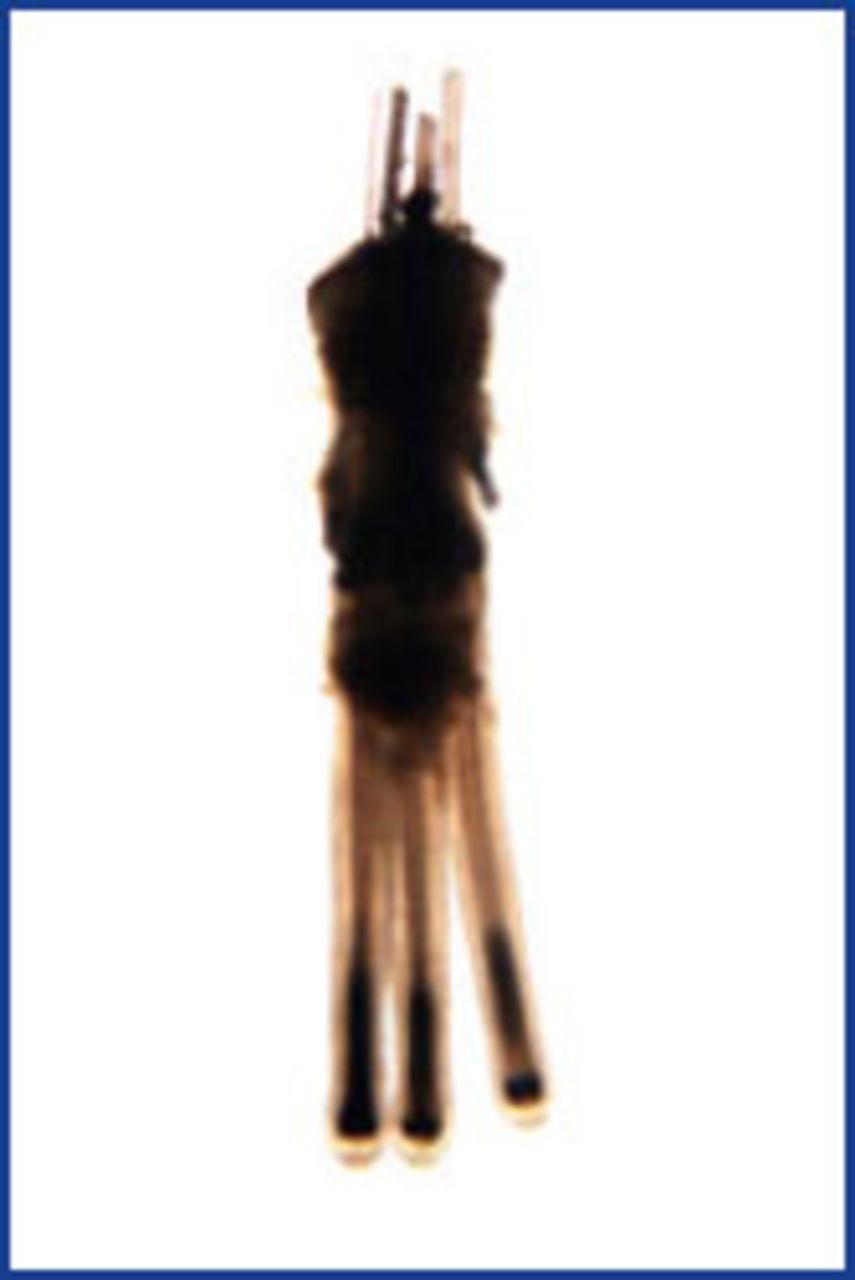
The follicles in grafts dissected from a strip are usually encased in tissue (Figure 13). The entire graft can be gently grabbed and placed as a unit without damage. FUE grafts are generally less protected with less soft tissue between and around their follicles and therefore more difficult to place (Figure 14). There is rarely fat inferior to the dermal papilla to grab with the forceps. In multi-haired FUE grafts, isolated, unprotected follicles often need to be grabbed by the forceps and gathered prior to placement. Placers need to be especially careful and gentle with FUE grafts to prevent trauma and decreased yield.

Dissected graft—stained

FUE graft—stained
The techniques described above have been used at my clinic to treat patients with no prior surgery (Figure 1), with prior unsatisfactory surgery (Figures 15 and 16), and using FUE (Figures 17 and 18).

Before: multiple prior minigrafts

6 months after 1,600 strip grafts

Pre-op: 1,600 FUE grafts

6 months post-op: 1,600 FUE grafts
Other techniques can be learned and successfully used to make sites and place grafts, including the stick-and-place technique. A variety of instruments can facilitate recipient site creation and placement, including mechanical implanters. Whichever techniques and instruments used, the basic theories discussed above apply.
Conclusion
In conclusion, recipient site creation and graft placing are often ignored, but certainly no less important topics for discussion. Producing the best results requires routine practice in all cases of measuring follicles, setting precise and customized recipient site depth and size, testing sites before and during recipient creation, careful graft selection, and atraumatic insertion. Important aspects include RPT, its recognition and prevention, and carefully matching the space created in the scalp with tissue volume added. FUE grafts are commonly more difficult to place so new skills must be learned to place them, and differential or graded graft placement can be the icing on the cake for those who are looking for ways to get the best results for their patients. Preservation of follicles moved leads to preservation of donor follicles as fewer will be needed over the course of a patient’s life. Great results lead to satisfied patients who will return and refer other patients.
- Copyright © 2014 by The International Society of Hair Restoration Surgery
In this issue


Jump to section
Related Articles
Cited By...
- No citing articles found.